OpticalApp
The future of accessible eye screening
AI-assisted eye screening on your phone with a radically affordable smartphone adapter.
Bridging the gap in eye care
Prohibitive cost
Traditional fundus cameras are expensive and stationary.
Limited access
Specialists cluster in cities; rural areas lack screenings.
Late detection
Many eye diseases are silent until damage is irreversible.
Radically affordable adapter
Designed for low-resource settings; portable and robust.
On-device AI
Offline analysis to enable field screenings without internet.
Referral-first workflow
Supports early identification and triage—not a medical diagnosis.
Simple interface, meaningful results
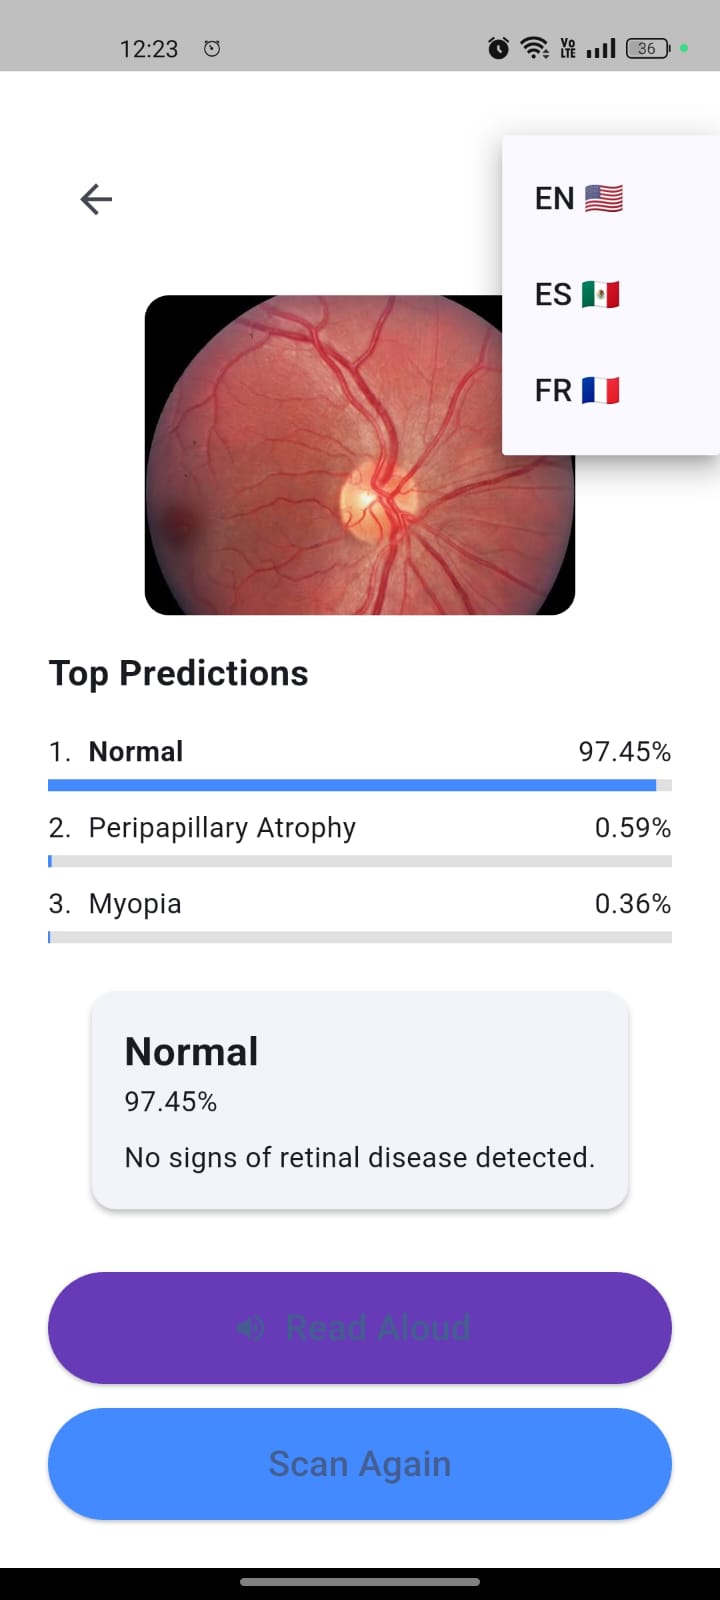
Healthy example

Anomalous example
Offline ML • Multilingual UI • Text-to-Speech guidance
Hardware concept
OpticalApp uses a smartphone-mounted optical adapter with integrated illumination and optics tuned for pupil capture. The public version of this site provides a conceptual overview only. Detailed dimensions, materials, and assembly procedures are restricted while intellectual property protection is underway.
Evaluators (e.g., competition judges, partners) can request full technical documentation under NDA.
Project insights
Optics
The design balances field of view, ease of alignment, and affordability. Multiple lens options are compatible; exact specifications are shared privately.
Illumination
Integrated lighting supports consistent captures in varied environments. Circuit details are withheld from the public site.
Software
On-device models enable offline screening and privacy-preserving workflows. Model architecture and datasets are described to evaluators as needed.
Work with us
We are piloting OpticalApp with clinicians and community programs. If you are a reviewer, partner, or health organization, request access to a protected technical brief.
Disclaimer: OpticalApp is intended for educational and screening pilot purposes and is not a certified medical device.
© OpticalApp. Patent Pending. All rights reserved.